Ubuntu安装MariaDB
在Ubuntu上安装MySQL可以通过以下步骤进行:
打开终端,更新包列表:
1sudo apt update安装MariaDB服务器:
1sudo apt install mariadb*设置自动启动
1systemctl enable mariadb安全设置(设置root密码,移除匿名用户,禁止root远程访问等):
1mysql_secure_installation会出现以下交互选项:
 1
 2
 3
 4
 5
 6
 7
 8
 9
10
11
12
13
14
15
16
17
18
19
20
21
22
23
24
25
26
27
28
29
30
31
32
33
34
35
36
37
38
39
40
41
42
43
44
45
46
47
48
49
50
51
52
53
54
55
56
57
58
59
60
61
62
63
64
65
66
67
68
69
70
root@VM-4-9-ubuntu:/home/codepeak# mysql_secure_installation NOTE: RUNNING ALL PARTS OF THIS SCRIPT IS RECOMMENDED FOR ALL MariaDB SERVERS IN PRODUCTION USE! PLEASE READ EACH STEP CAREFULLY! In order to log into MariaDB to secure it, we'll need the current password for the root user. If you've just installed MariaDB, and haven't set the root password yet, you should just press enter here. Enter current password for root (enter for none): # 这里输入密码 OK, successfully used password, moving on... Setting the root password or using the unix_socket ensures that nobody can log into the MariaDB root user without the proper authorisation. You already have your root account protected, so you can safely answer 'n'. Switch to unix_socket authentication [Y/n] # 回车 Enabled successfully! Reloading privilege tables.. ... Success! You already have your root account protected, so you can safely answer 'n'. Change the root password? [Y/n] # 输入密码 New password: Re-enter new password: Password updated successfully! Reloading privilege tables.. ... Success! By default, a MariaDB installation has an anonymous user, allowing anyone to log into MariaDB without having to have a user account created for them. This is intended only for testing, and to make the installation go a bit smoother. You should remove them before moving into a production environment. Remove anonymous users? [Y/n] # 回车 ... Success! Normally, root should only be allowed to connect from 'localhost'. This ensures that someone cannot guess at the root password from the network. Disallow root login remotely? [Y/n] # 回车 ... Success! By default, MariaDB comes with a database named 'test' that anyone can access. This is also intended only for testing, and should be removed before moving into a production environment. Remove test database and access to it? [Y/n] # 回车 - Dropping test database... ... Success! - Removing privileges on test database... ... Success! Reloading the privilege tables will ensure that all changes made so far will take effect immediately. Reload privilege tables now? [Y/n] # 回车 ... Success! Cleaning up... All done! If you've completed all of the above steps, your MariaDB installation should now be secure. Thanks for using MariaDB!进入MariaDB,输入密码
1mysql -u root -p查看字符集
 1
 2
 3
 4
 5
 6
 7
 8
 9
10
11
12
13
14
15
16
17
18
19
20
21
22
MariaDB [(none)]> show variables like "%character%";show variables like "%collation%"; +--------------------------+----------------------------+ | Variable_name | Value | +--------------------------+----------------------------+ | character_set_client | utf8mb3 | | character_set_connection | utf8mb3 | | character_set_database | utf8mb4 | | character_set_filesystem | binary | | character_set_results | utf8mb3 | | character_set_server | utf8mb4 | | character_set_system | utf8mb3 | | character_sets_dir | /usr/share/mysql/charsets/ | +--------------------------+----------------------------+ 8 rows in set (0.001 sec) +----------------------+--------------------+ | Variable_name | Value | +----------------------+--------------------+ | collation_connection | utf8mb3_general_ci | | collation_database | utf8mb4_general_ci | | collation_server | utf8mb4_general_ci | +----------------------+--------------------+UTE8MB3是MYSQL默认的字特集编码,它最多只能存储三个字节的Unicode符、这意味着UTF8MB3无法存诸某些特殊字符,如一些特殊符、表情符号等。为了解决这个问题,MySQL引入了UTF8MB4编码。UTF8MB4支持存储四个字节的Unicode字符,可以容纳更多的特殊字 符。可以按如下方式设置字符集。
设置字符集
- 编辑文件在
1sudo vim /etc/mysql/mariadb.conf.d/50-server.cnf[mysqld]中加入:1 2 3 4 5 6 7 8[mysqld] init_connect='SET collation_connection = utf8mb4_unicode_ci' init_connect='SET NAMES utf8mb4' character-set-server=utf8mb4 collation-server=utf8mb4_unicode_ci skip-character-set-client-handshake bind-address = 0.0.0.0 # 设置外网可访问 - 编辑文件在
1sudo /etc/mysql/mariadb.conf.d/50-client.cnf[client]重加入:1 2[client] default-character-set=utf8mb4 - 编辑文件在
1sudo vim /etc/mysql/mariadb.conf.d/50-mysql-clients.cnf[mysql]中加入:然后再重启MariaDB:1 2[mysql] default-character-set=utf8mb4
1systemctl restart mariadb再查看字符集:
1 2 3 4 5 6 7 8 9 10 11 12 13 14 15 16 17 18 19 20 21 22 23 24 25 26MariaDB [(none)]> SHOW VARIABLES LIKE "%character%"; SHOW VARIABLES LIKE "%collation%"; +--------------------------+----------------------------+ | Variable_name | Value | +--------------------------+----------------------------+ | character_set_client | utf8mb4 | | character_set_connection | utf8mb4 | | character_set_database | utf8mb4 | | character_set_filesystem | binary | | character_set_results | utf8mb4 | | character_set_server | utf8mb4 | | character_set_system | utf8mb3 | | character_sets_dir | /usr/share/mysql/charsets/ | +--------------------------+----------------------------+ 8 rows in set (0.001 sec) +---------------------------------------+--------------------+ | Variable_name | Value | +---------------------------------------+--------------------+ | collation_connection | utf8mb4_unicode_ci | | collation_database | utf8mb4_unicode_ci | | collation_server | utf8mb4_unicode_ci | | rocksdb_error_on_suboptimal_collation | ON | | rocksdb_strict_collation_check | ON | | rocksdb_strict_collation_exceptions | | +---------------------------------------+--------------------+ 6 rows in set (0.001 sec)注意:
参考:MySQL5.7 — Character Set、Unicode
由于 character_set_system 选项默认为 utf8mb3且为只读参数(无法修改),所以不用修改。
character_set_system作用的目标为数据库的元数据。MySQL认为表示数据库的基本信息,但是又不属于数据库的数据内容的数据,就叫做元数据。比如数据库名,表明,列名信息等,你可以简单理解为数据库的结构层面的信息。对应到具体的实体来说就是使用show命令查看的内容或者是使用select命令INFORMATION_SCHEMA数据库中字符集:
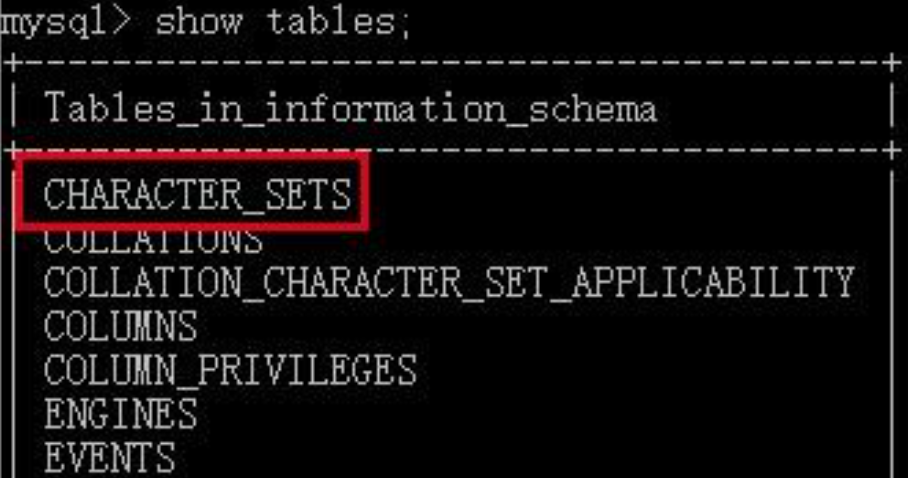
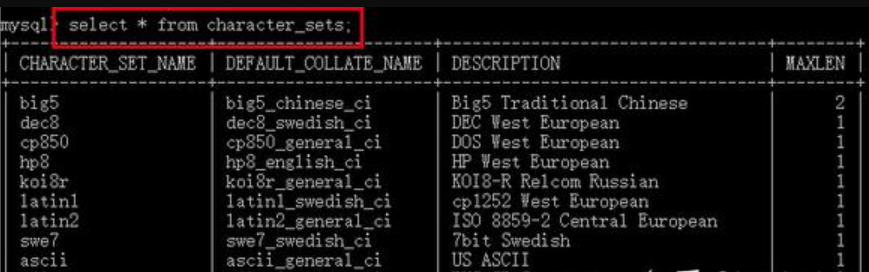
而且该选项是只读的,我们没有 办法进行设置:

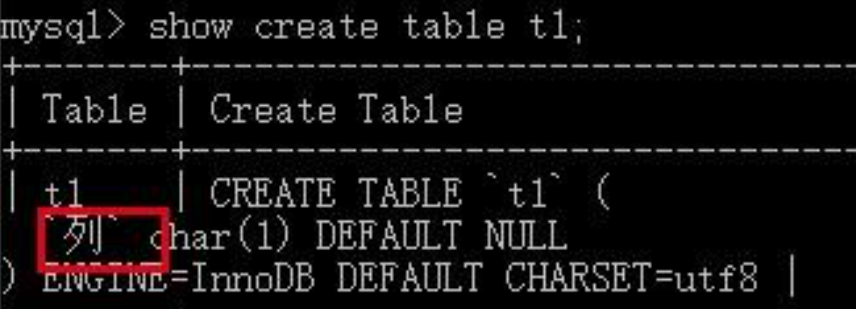
我们通过创建一个含有中文列名的表进行测试:
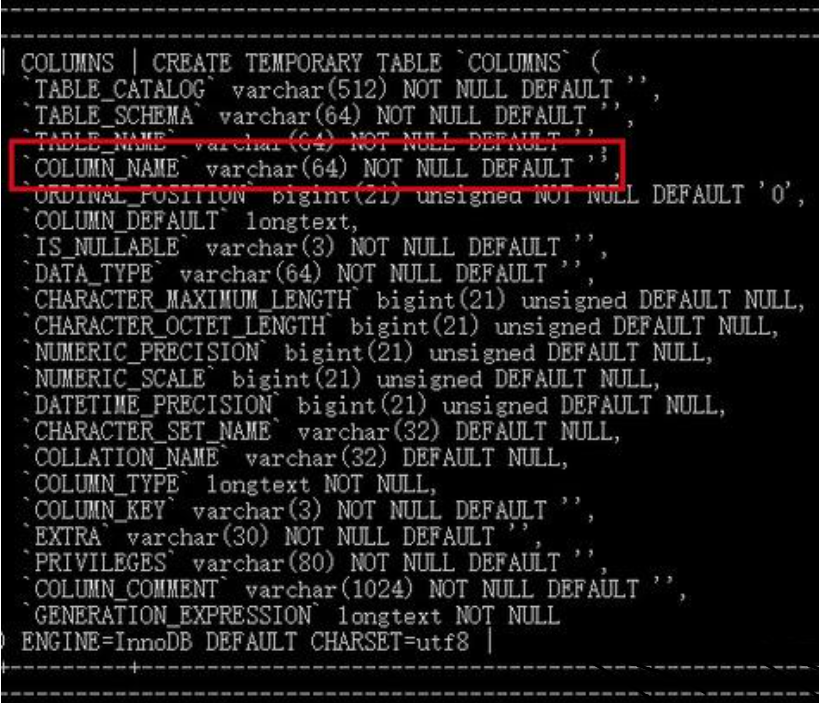
INFORMATION_SCHEMA.COLUMNS表中记录了mysql数据库中所有的列的元数据,可以看到具有列名这个列:
由于存储元数据的字符集是utf8,所以通过length函数,我们可以看到列名 ‘列’ 占用的字节数为3:

我们来了解一些基本知识,整个MySQL的结构为:MySQL服务器 -> database -> tables -> column -> row,其中前四个为数据库的元数据,最后一个为数据库的内容。无论是数据库的元数据还是数据库的内容都需要持久化到磁盘上。元数据的在存储时使用的字符集是统一的,通过character_set_system变量进行控制。而数据库的内容在存储时,所采用的字符集主要是由其column的字符集决定的,我们可以在建表时指定列的字符集,如下图所示:

但在建表时,为列单独设置字符集这一操作是可选的,也就是说我们可以不为列单独设置:
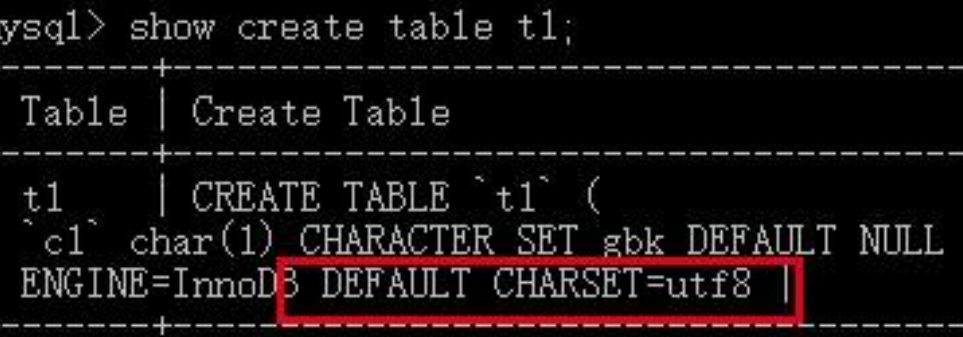
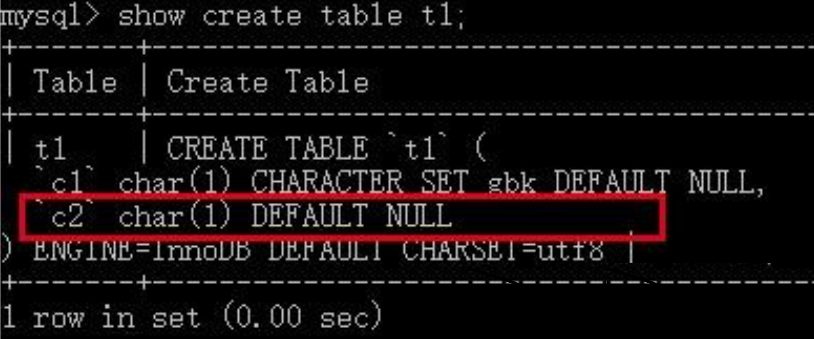
可以看到数据表有一个默认的字符集utf8,即如果我们不为列单独设置字符集,则默认继承其所在表的字符集,这很容易进行测试,首先来添加一个没有设置字符集的列:

通过show命令可以看到其并没有单独的字符集设置:
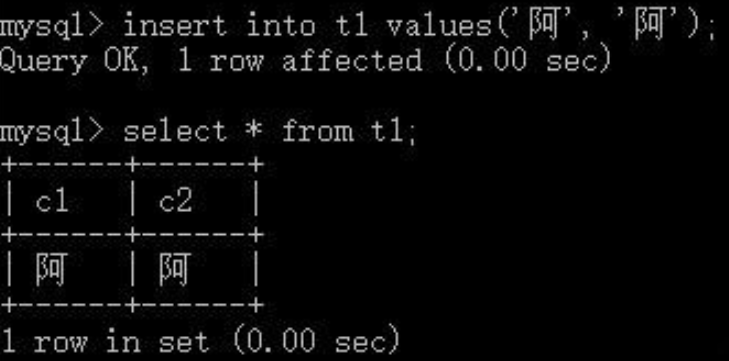
我们向这两个列中各插入一个汉字:
可以看到gbk字符集的c1列占用了2个字节,设置为utf8的c2列占用了3个字节:
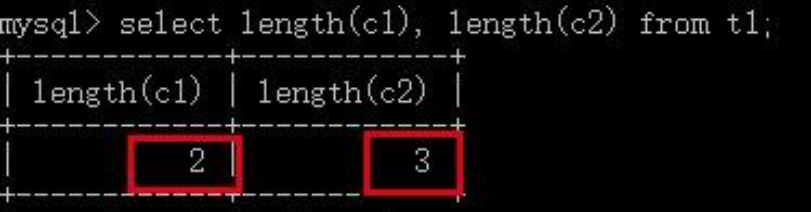
过虽然可以为列单独设置字符集,但在日常开发中我们仅仅对表进行显式的字符集指定:
看到这里我们可能会产生一个问题,在上一个测试中,并没有显式的设置数据表t1的字符集,其默认的字符集utf8是从哪来的呢?答案是其所属的数据库。
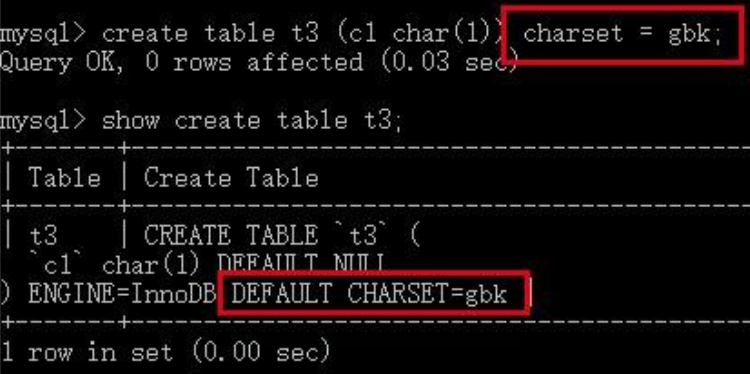
如同建表一样,我们可以在创建数据库时显式的指定数据库的字符集:

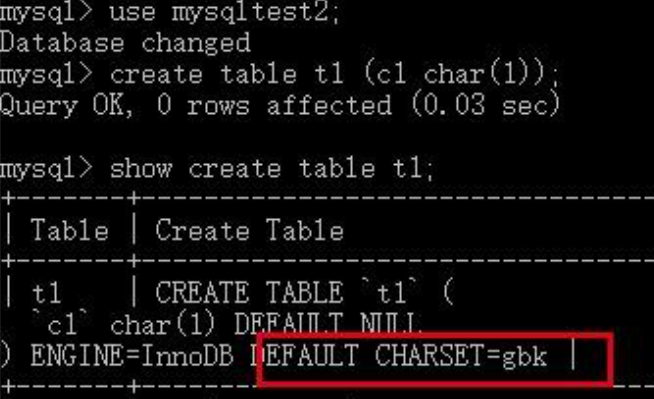
在mysqltest2中创建的表如果不显式的指定字符集,其字符集默认就是gbk,继承于其所在的数据库:
有了前面的思考,我们自然而然的会想到一个新的问题,我们在创建数据库时如果不显式指定字符集,其默认字符集是从哪里继承而来的?答案就是character_set_server选项。
我们在平时使用MySQL时,如果没有特别的需要,尽量不要去修改其默认的字符集设置。并且有以下几个建议:
保持character_set_client、character_set_connection、character_set_results相同 表的字符集尽量使用默认从character_set_server配置的 尽量不单独指定表和列的字符 character_set_server最好配置成utf8mb4
- 编辑文件
添加用户,并设置权限
1create user '用户名'@'localhost' identified by '密码';授予外网登录权限
1grant all privileges on *.* to '用户名'@'%' identified by '密码';被授予的用户也可把此对象权限授予其他用户或角色
1grant all privileges on *.* to '用户名'@'hostname' identified by '密码' with grant option;刷新权限
1flush privileges;查看用户
1mysql>SELECT User, Host FROM mysql.user;删除某个用户
1DROP USER '用户名'@'localhost'简单的用户和权限配置基本就这样了。
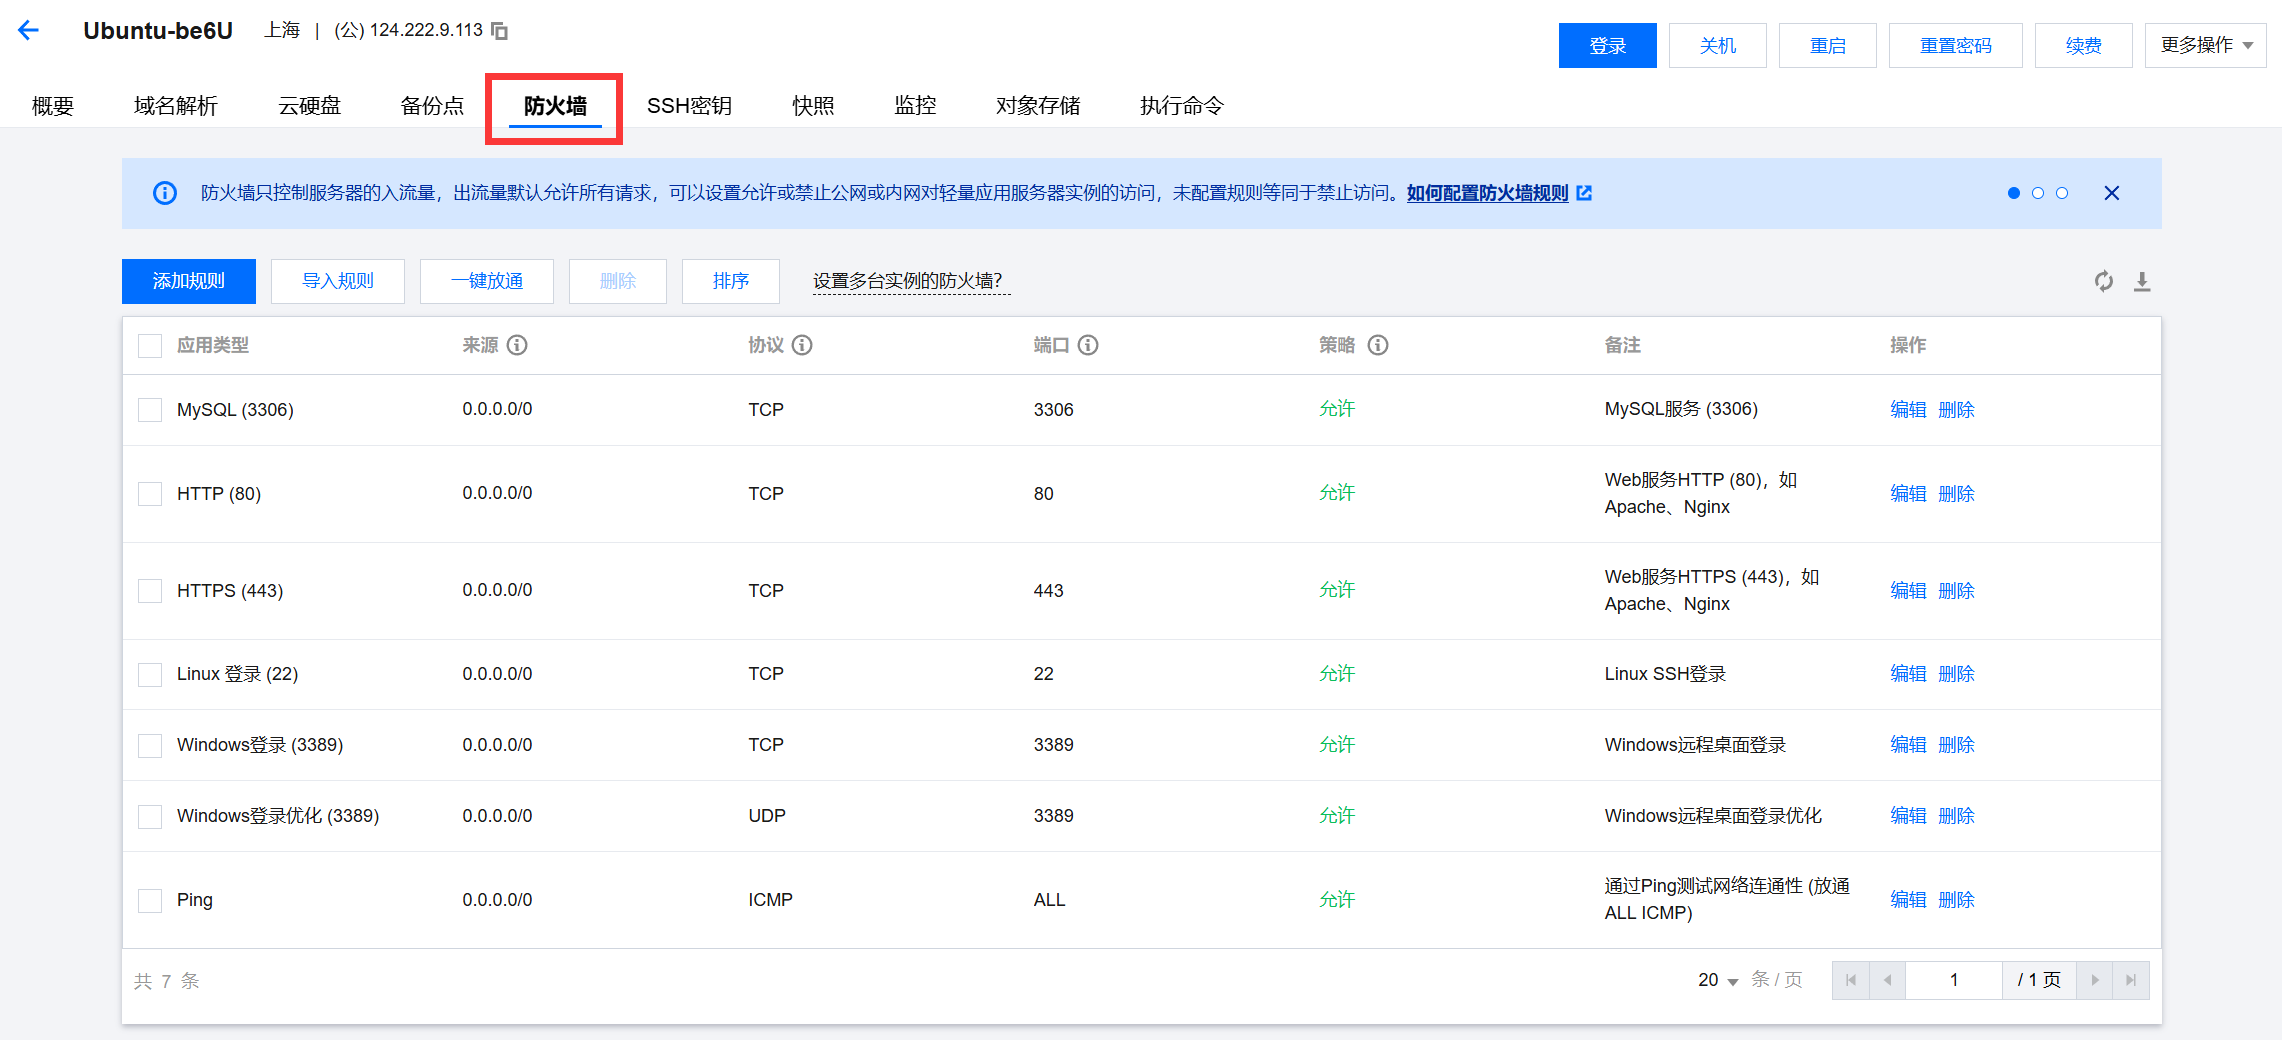
云服务器开启远程访问
如果右防火墙,需要关闭防火墙。使用root用户的权限永久开启防火墙的3306端口(3306即是mariadb默认使用的数据库连接端口,若有需要,可以去配置文件中更改为其他端口号),–permanent参数表示永久生效,即使服务器重启。
1 2 3firewall-cmd --zone=public --add-port=3306/tcp --permanent firewall-cmd --reload firewall-cmd --list-all同时需要在云服务器的防火墙上打开3306端口才行。
 支付宝
支付宝 微信
微信